Tuesday, March 28, 2023

Loads of Love

Hi y'all! 
Happy Tuesday, hope all is well?! :)

I'm up on the Coffee Loving Cardmakers blog today sharing this card...


For more info. and details, be sure to swing on over to the CLC blog...I'd love to see you there! :)

Thanks so much for stopping by! 
Have a great day and see you soon! 

Thursday, March 23, 2023

I can't decide if...

Hi y'all! 
Hope all is well?! :)


I'm swinging in today to share a card I made for Amy's Woodblock Wednesday feature. Without further ado, here is my card...


I used a Hero Arts woodblock stamp, along with a Bossy Joscie woodblock stamp. I kept things simple and just did some coloring with colored pencils. That's pretty much it. :) Oh, and I added a touch of tiny splatters with a Copic pen. Easy peasy, right?!...


Thanks so much for stopping by!
Have a great day and see you soon! 

Friday, March 17, 2023

Big flowers and a Big hello

 Hi y'all! 

I'm sharing this card today on social media for Scrapbook Pal. :)

Anyone else ready for springtime, especially the sweet smells of blooming flowers? I’m more than ready and I’m sharing a card to show it. :)


I’m using Altenew’s Paint a Flower Gerbera Revolution Outline stamp, along with Copic markers. Then a little hot foiled sentiment from Spellbinders Spring into Glimmer Collection Sentiments for Everyday and a touch of Altenew’s Cherry Blossom enamel dots. Simple and sweet, right?!

To make this card:

1. Take a marker friendly paper/cardstock, stamp on the image from Altenew and color things up using Copic markers.

2. After add a few faux paint splatters using a black Copic marker.

3. Time for hot foiling! Use the Spellbinders glimmer die with gold foil and then use it with the matching die.

4. Add everything to your card base and then top things off with a touch of enamel dots from Altenew.

That's it! You made this card!

Thank you so much for stopping by!

Have a great day and see you soon!

Main products used: Altenew-Paint a Flower Gerbera Revolution Outline Stamp, Spellbinders-Spring into Glimmer Collection Sentiments for Everyday, Spellbinders Gold Glimmer Hot Foil, Altenew-Cherry Blossom Enamel Dots, Copic Markers-R39, RV29, RV25, RV23, Y11, Y02, Y08, G07, YG06, YG13, YG11.

Tuesday, March 14, 2023

Hey BREWtiful

 Hi y'all! 

Happy Tuesday, hope all is well?! :)

I'm up on the Coffee Loving Cardmakers blog today sharing this fun card...

To get all the details about my card, be sure to swing on over to the CLC blog...maybe even leave some love there. :) 

Thanks so much for stopping by!
Have a great day and see you soon! 

Tuesday, March 7, 2023

Ahoy, Matey!

Ahoy, matey! I'm up on the Scrapbook Pal blog sharing a fun card and a couple tags, today! 

How about some cute critters that just happen to be pirates and are ready for a party?!...Avery Elle's new Ahoy, Matey stamp set and Ahoy, Matey die set is so super fun and perfect for all your celebrations! 

How about we make this card and a couple tags to go with!

Let's start with the card:

1. Stamp out the images onto a color friendly white cardstock. *note: stamp multiply of each image, so you can use them later for the tags.

2. Grab some Copic Sketch Markers and color those images up! Colors for walrus: W5W3W1E27E59E57E34, E30E31E55R29R59BG49BG45BG53, and RV52. Colors for octopus: B39B28B24B05B02B00R29R59N8N6, N4N2RV52, and RV25. Colors for balloons: Y02Y08Y17YR04B39B28B24G07G14, and YG06. Colors for treasure chest: E55E57E59E39, and E34. Colors for seagull: C1C2, 0, B24B28Y02Y08R29, and R59. Colors for bottle: E31E34E55E57B41, and 0. Colors for sword and hook: N2N4, and N6. Colors for coins: C3C5E13E23, and E27

3. Use the matching dies and die cut the images.


4.Take a piece of orange colored cardstock and stamp on the 'dotted line' and 'x' images. Use Avery Elle's Easy Layers 1 banner die with white cardstock and stamp on 'Ahoy, Matey!'. 

5. Use Avery Elle's Easy Layers 1 border die with the stamped panel.

6. Add the panel to the card base and then adhere the images and sentiment. 

7. Top things off with Altenew's Glacier Caves enamel dots.
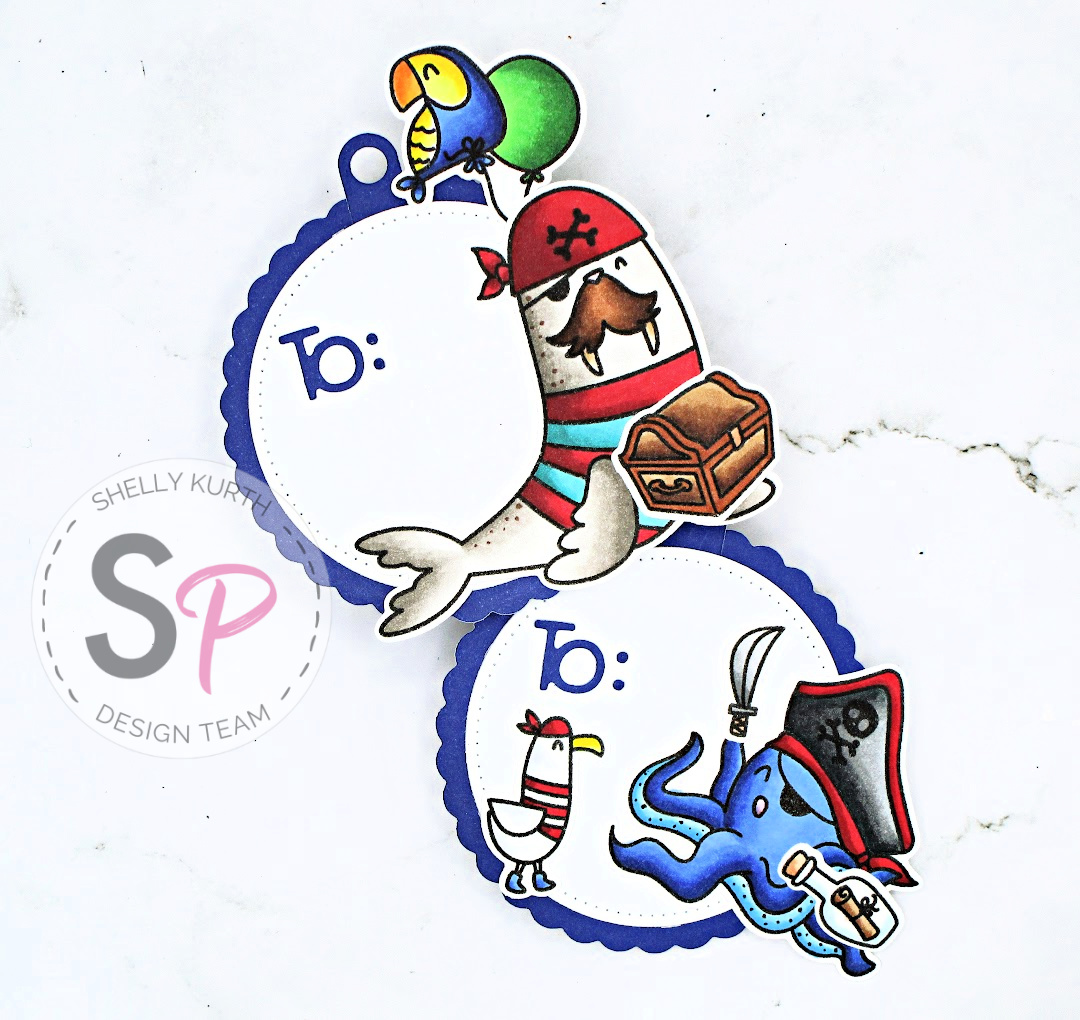

You just made this card!

Now, for the tags:


1. Use Avery Elle's Holiday Circle Tags dies with white cardstock and a blue cardstock. 

2. Adhere the tag die cut pieces together. 

3. Add the previously colored and die cut images to the tags. 


That's it! You made a couple tags! 

So fun, right?!...


Thanks so much for stopping by!
Have a great day and see you soon! 

Main products used: Avery Elle-Ahoy, Matey stamp setAvery Elle-Ahoy, Matey die set, Copic Sketch Markers-W5W3W1E27E59E57E34E30E31E55, R29R59BG49BG45BG53RV52B39B28B24B05B02, B00N8RV25Y02Y08Y17YR04G07G14YG06E39C1C2B41N2N4N6C3C5E13E23, and 0Avery Elle-Easy Layers 1 die set, Avery Elle-Holiday Circle Tags die setLawn Fawn-Jet Black inkAltenew enamel dots-Glacier CavesBearly Art Glue, 3L Scrapbook Adhesives-Foam SquaresTombow Mono Adhesive-Permanent. 

Thursday, March 2, 2023

You are lovely

Hi y'all! 
Happy Thursday, almost Friday! Hope all is well?! :)

I'm swinging in to share a 'just for fun' card, no design team work or challenges, just fun. Without further ado, here is my card...


I pulled out my colored pencils and did some coloring. I also used a Simon Says Stamp set that I had since last Christmas...guess that tells you how long I let things sit. (lol) I did keep things relatively simple, I used a stencil for the background and that's pretty much it. Coloring and stenciling. :) Easy peasy, right?!...

Well, that's all for me.
Thanks so much for stopping by!
Have a great day and see you soon!